iPad + ArtRage + Inkscape = Creating Hand-Drawn Type
Hand-Drawn Vector Art
Sometime creating vector art can look too mechanical and computerized. It’s nice to create resolution-independent art that feels like it was hand drawn. No matter if you use Illustrator, Inkscape, or even Corel Draw, you can easily bring your hand back into your design, giving your final result a hand-drawn vibe.
In the past my process has included using a Modbook (customized Apple Tablet), ArtRage (a rocking pixel based painting program), and Illustrator‘s Live Trace. In the past couple months I’ve been trying to figure how I can get the same kind of results with my iPad. Here are the steps. You can do the same for any type of illustration work that you want a more hand-rendered result.
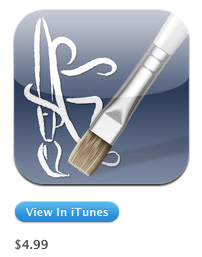
1. Download ArtRage App on iPad and Get a Good Stylus
If you already have an iPad, a Modbook, or even a old-fashioned laptop with Wacom pen, download ArtRage. It’s a wonderful natural media drawing tool like Corel’s Painter but without the steep learning curve. On the iPad, ArtRage is currently only $4.99—a steal of a price. The control and the power on my Modbook is unquestionable, but I actually find myself using my iPad quite a bit more. The main reason portability and a long battery life. The Modbook is HEAVY to lug around and only lasts about three hours per charge. Whatever device you have/use, you can create wonderful work with ArtRage.
-
$4.99 Art Rage iPad App - I’ve tried many styluses and my favorite so far is the Nataal. I got it on Amazon for less than $8 and it’s the most accurate with the least amount of friction. Other styluses have very rubbery tips which cause friction on the screen, resulting is resistance which after a while will give you a tired arm. Nataal has a smaller head and it by far the best stylus I’ve used to date.
2. Make Your ArtRage Document LARGE and Smooth!
Once you are installed and ready to go, create your document. When you create your painting doc, you want to make it large and smooth. Eventually, you will be taking your pixel info into your vector program du jour and auto tracing the image. To get the best results, you want your your painting to be large. A large file equals more pixel info. For working on a laptop, I create a canvas size that is 20 inches x 20 inches at 300 ppi. You can set this up in main menu’s ‘Edit/Resize the Painting.’ For the iPad app, you have a maximum size of 2048 x 2048 pixels.
The next thing that you want to do is make your canvas as smooth as glass. You will be asked the canvas texture when you create a new file on the ipad. Set Metallic to ‘0’, ‘Roughness’ to ‘0’ and click on ‘Grain’ and select ‘No Grain.’ Again, make sure your dimensions are set to the maximum size for the iPad (2048 x 2048 pixels).
For people on a laptop with a Wacom tablet, you can smooth the canvas in the layers drop down palette menu. Click the drop-down menu and select ‘Canvas Options.’ Once you’re in the ‘Canvas Options’ dialogue, turn everything to ‘0’ like the iPad except for Opacity.


- 3. Create a rough sketch with the pencil tool.

Start to draft out your illustration. Flesh out the design/ illustration. Here is where you can be as messy as you want to be. Plot you drawing. Artrage is wonderfully responsive and is just like using a sketchbook. What I love is the ability to be able to zoom into an image when you are drawing. Sometimes when I’m drawing on paper, I find myself trying to pinch zoom on the paper. It would be cool if we could have that function in real life:)
4. New Layer + Ink Pen for Clean Up

Once you are satisfied with your pencil sketch, create a layer over top of the pencil layer to pen the illustration and finalize your work. The Ink Pen is great because you can adjust the smoothness of the line, giving you a lot of control. Use black as your color to get the most amount of contrast
5. Save Painting File and Image File
When you’ve perfected your final inked layer, you’re ready to save your painting file (.ptg). After you save on the iPad, go back to the gallery and send your file as a photo to your camera roll. It was make a .jpg image file. Email the image to your desktop to auto trace the image. For the desktop version of ArtRage, go to ‘File/Export Image File.’
6. Auto Trace Your Image in Inkscape/Illustrator
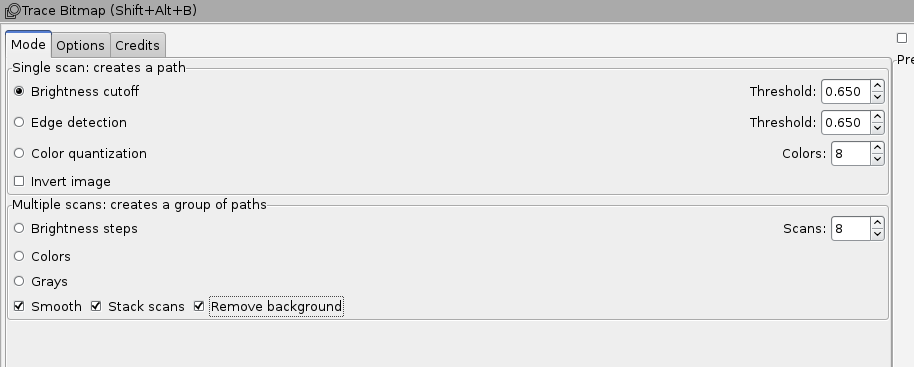
- Bring your image file into your vector program of choice. Illustrator calls the auto trace function ‘Live Trace.’ For this example I’m going to be using Inkscape. Their auto trace is called ‘Trace Bitmap’ and is found in the ‘Path’ menu. Import the image into Inkscape. With the image selected go to ‘Path/Trace Bitmap.’ Copy the parameters of the image below. Once done, hit ‘Okay.’ There you go! Hand-drawn goodness.
-

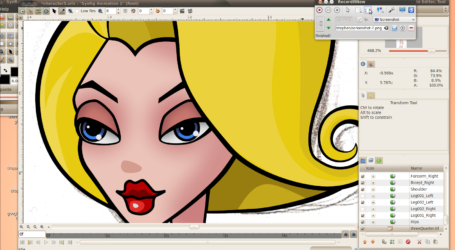
Final Vector Art
- I recently wrote a post comparing Illustrator and Inkscape for their auto trace capabilities if you are interested in the differences of the two programs. Illustrator CS6 has redesigned ‘Live Trace’ and it will be interesting to see the improvements.