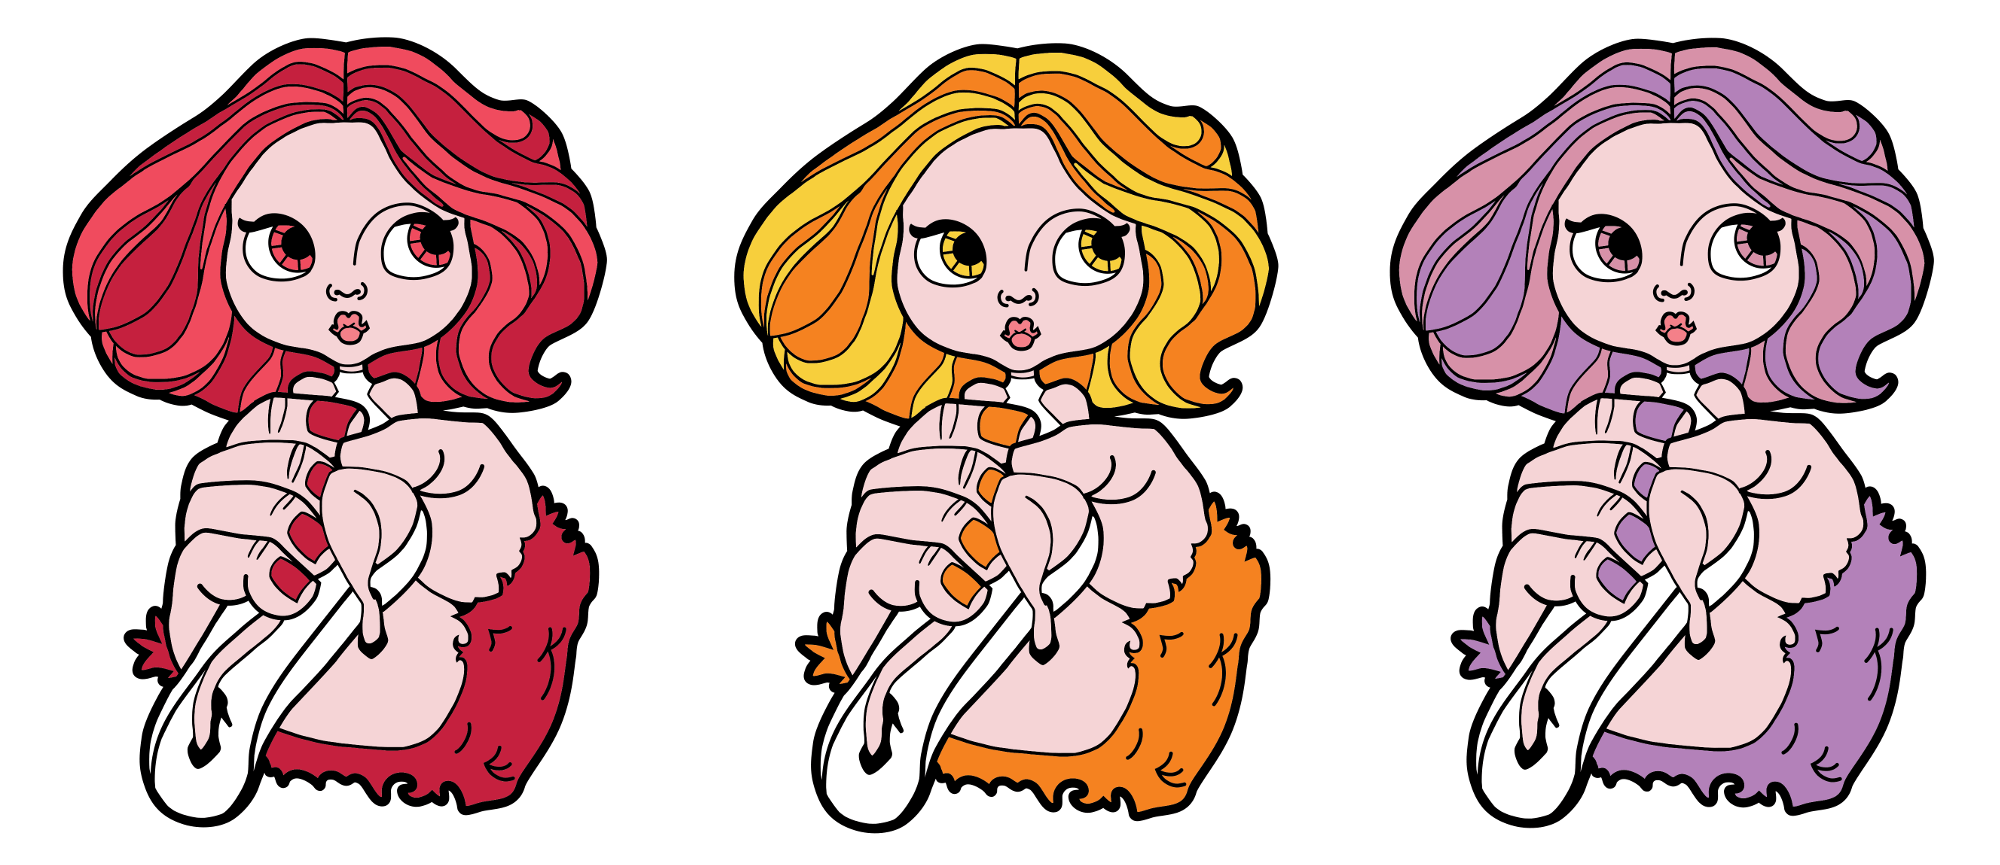
This month I made my first set of pins that are based on an illustration from my upcoming coloring book. I picked one of the illustrations that I really liked and thought would translate easily as a pin.
To create an enamel pin, there are a lot of rules you need to follow regarding prepping art. Line thicknesses and providing the needed allowances for enamel fills dictate a lot of artistic decisions essential for best results.

There are plenty of sites outlining pin creation specs and any vendor you select will provide guidelines for achieving your creation.
What I thought I could share is what software tools I use to create my art and each step I took along the way. When making art, I believe in using the best software for the task needed. Having an agnostic approach when it comes to software gives provides the strongest tools when needed instead of using one program for everything. Most of the tools that I use happen to be free or open source, so there’s very little to invest in making some great art. I can’t stress enough that although freeware and FOSS (Free Open Source Software) are free to use, please consider supporting the developers whenever possible. Money, time and promotion are all things that developers appreciate.
Step one: sketching and inking
For drawing, I have exclusively been using tablets. It’s like have a digital notebook that portable and always at my fingertips. Plus the files are easy to transfer into production—no scanning needed.

On both iPad and Android, I prefer working in the MediBang Paint app. It’s a free app that let’s you work in large format with an unlimited amount of layers. I have found that the Android version of the software tends to crash when too many layers are added and the file becomes too big. If you prefer to work on desktop, they even have software for Mac and Windows.
To have the best experience with MediBang, sign up for a free online account. This account gives you access to numerous brushes and unlimited space on their cloud. Did I mention it’s free? MediBang’s makes money on individuals self publishing their manga on their site, so they offer all the tools for free to help people create work. It’s an interesting idea business model and very similar to Apple’s iBook Author.
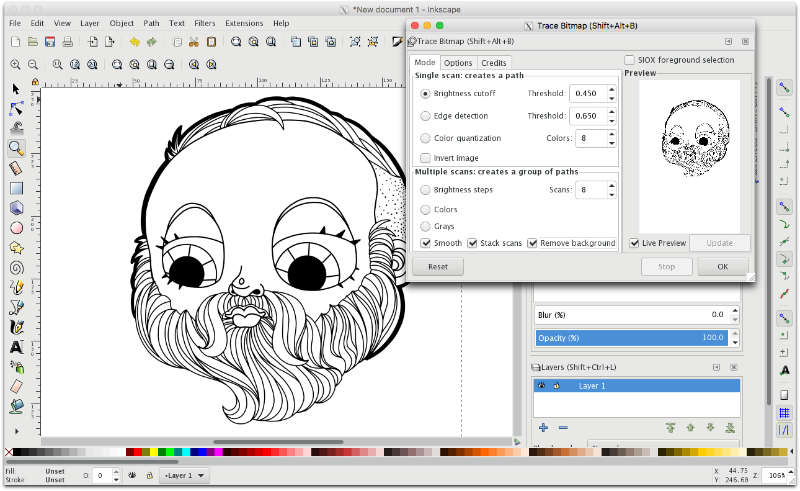
Step two: trace inked sketch
Once your sketch has been finalized, it’s time to trace that drawing and transform it into editable vectors. Inkscape is the only software that I have found that does an impressive tracing and maintains the integrity of your line quality. Years ago, I wrote a side-by-side comparison between Inkscape and Adobe Illustrator, showing the differences. There are settings that I prefer to use in Inkscape, but you can play with it and see what works best for you.
Step three: node editing and simplifying vector art
Again, Inkscape wins hands down over any other vector software for node editing. For this step I consider adjusting line thickness and simplifying the amount of detail.
To remove unwanted lines, I draw a box over the unwanted line. Then I select both the box and the art and choose Path/Difference (that’s Pathfinder’s Minus Front for Adobe users) and that cuts a hole.
Once the line is broken, I begin deleting unwanted nodes.
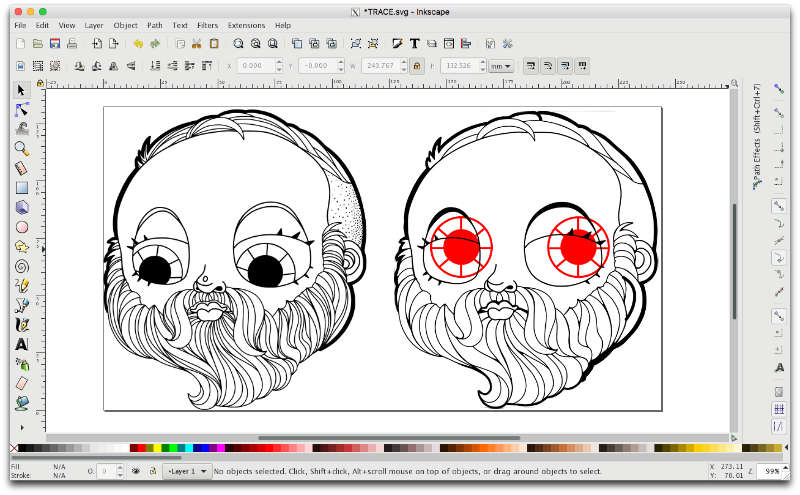
One of the greatest editing strengths that separates Inkscape from other software are the types of nodes you can create. You can transform nodes to Smooth Nodes and that automatically will smooth your line/shape. Also, when you delete nodes, Inkscape does a great job of averaging out the nodes that are remaining, maintaining the shape of your path. It’s pretty impressive.

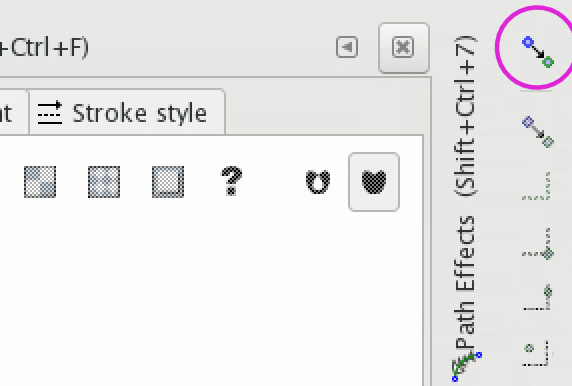
One thing that I prefer is to turn all snapping off when doing node editing. I don’t need hints to appear and I especially don’t need a node that I’m moving to auto snap to another path, node, grid or guide. You can find the snap features to the right of your canvas. Also, Mac users may notice that trying to copy and paste objects has an undesirable result of converting to raster. To fix this, go into the Quartz X11 preferences and deselect the “Update Pasteboard when CLIPBOARD changes” option.
Step four: Adding line thickness and making strokes shapes
When the art is simplified, the line thickness may need to be plumped up. If there are only certain lines that need to be addressed, I’ll move nodes in Inkscape. If I need to globally adjust line thickness, I’ll transfer the file over to Adobe Illustrator.
I rely on Illustrator over Inkscape for this function because I have never been successful merging multiple shapes at the end of this step, but I’m getting ahead of myself.

For global adjustments, I select the art in Illustrator; add a slight stroke to the art. Then with the art still selected, I go to Edit/Expand or Edit/Path/Stroke to Object and make the stroke a shape. This will give you a stroke shape and a fill shape. What you need to do is join these two together to make one final shape. This is the part of the process that I could never figure out in Inkscape. With both shapes select click on the Union button in the Pathfinder palette and viola: one shape.
Step five: filling color areas
While I’m still in Illustrator, I’ll use the Live Paint Bucket tool to fill areas with color. Of all the programs that are currently available, Illustrator does the best job. Inkscape has a paint bucket tool, but the results are sloppy and depend on how zoomed in you are on the art. Affinity Designer has a paint bucket tool but it only works on raster layers and not vector.

Once I create fills for my colors using the Live Paint Bucket tool, I expand the final selected art and start selecting Pantone colors for my pins. There are tricks to get a usable Pantone palette in Inkscape, but I just do it in Illustrator since I’m already in the software for creating fills.

There you have it
And those are the steps that I take for creating enamel pins. I hope that this was helpful and I’d be curious to know what other people use or tips and tricks. I’m new to making pins, but I’m finding them fun and easy to create.