
Anime Studio 360
 For the past year I’ve been re-dabbling with Anime Studio. I’ve used Anime Studio since way back in 2003 when it was called Moho. For creating quick cut-out animations, no other software can compare to its power, simplicity and ease of use. Back in the day when I used to create animations for video and broadcast, I would offer Anime Studio to clients as a solution for projects with lower budgets or tight deadlines.
Coming back to Anime Studio
I took a hiatus from the software for a fair amount of years. During the back half of the 2000’s, there was less work available for animation and video graphics in my area. Storyboarding jobs seemed to be drying up and budgets were getting smaller for existing projects. I decided to shift back to advertising work and ultimately became a director of a graphic and web program in Georgetown.
Last year, I started getting back into animation and using my free time to work on projects. It’s been fun reacquainting myself with old tools like Anime Studio and Toon Boom Animate Pro. I also have been looking at new alternatives like Synfig and Animation Desk.
On Sunday mornings, I started doodling storyboards/animatics in Animation Desk. Animation Desk’s a great tool for creating animatics on your iPad. I like it because it’s portable and has a simple user interface. Here’s the quick little animatic that I drew. It was based on a song called “Could Be” by Jenny Mayhem.
While I was creating the animatic in Animation Desk, I noticed Anime Studio came out with a new version which had something called smart bones. Smart bones seemed like the answer to every mystery of life. Creating dials out of skeletal bones, you can apply actions like head rotations, facial expressions and so much more. After seeing Anime Studio’s new potential, I had to try it out.
Here’s a video created by Danny Sugar (AKA”Funksmaname”) on how to use smart bones. This video inspired me to use Anime Studio and invest in an upgrade.

Are smart bones smart?
The short answer is “yes”. It’s really a revolutionary approach for creating actions and expressions for rigged characters. I created two characters so far and fully rigged one with expressions and create a full 360° turn with one set of layers. It’s really pretty amazing. With other programs, you end up with a nested mess of layers that you need to sort through or even worse, everything is hidden in an symbol.
The slight downside is that it’s uhcharted—kind of like the wild west. I learned how to create a character that works for me by watching videos, experimentation, and asking questions. There are tons of helpful people on the Anime Studio Forum that can help you out whenever you hit a roadblock.
One of the most helpful things I learned was reading between the lines while watching how-to videos. There isn’t enough time on a video to explain every nuance of their workflow and there are probably some secrets that people like to keep to themselves on how they create their magic. When I watch videos, I pay attention to what isn’t being discussed. When watching a how-to video, pay careful attention to the demonstrator’s layer palette. It gives a lot away on how they design the character and the set up. Also, when a layer is selected, look at everything that is available on that layer. It gives you a lot of insight on how to properly build a character.

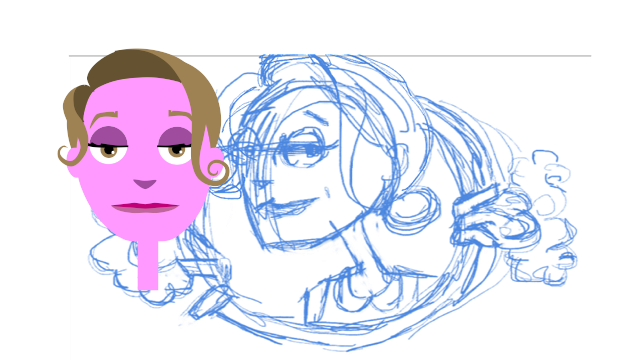
Here’s a little test I created to see Jenny in action.
Character 360
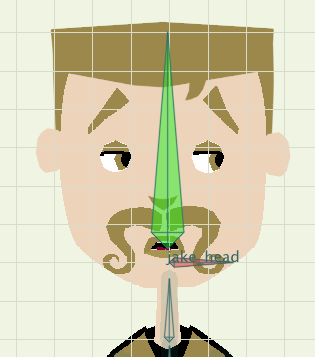
I took what I learned from creating the Jenny character and tried to create a full 360 character out of Jake using smart bones.
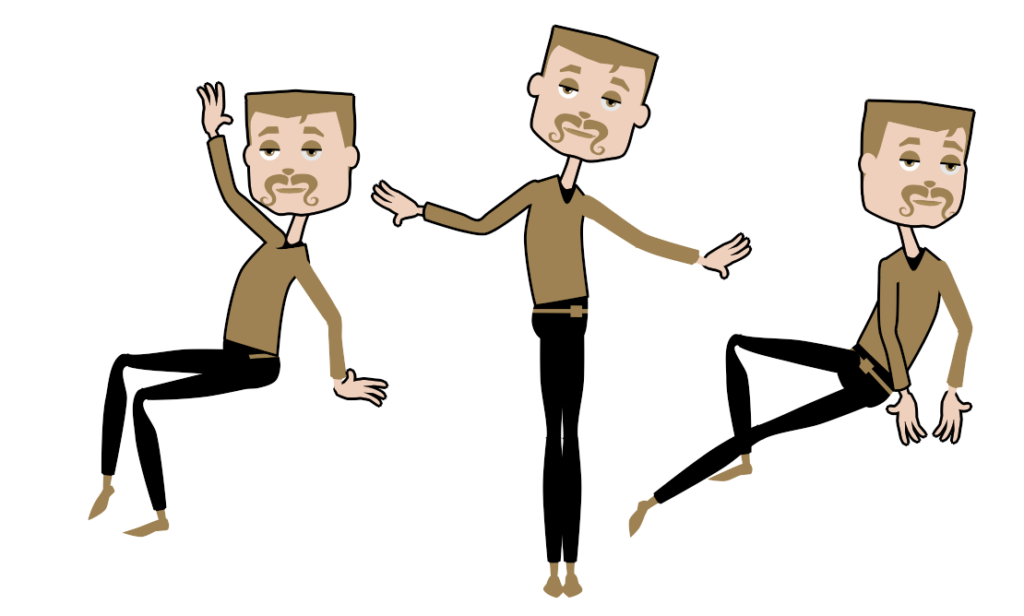
To do this, I first created all the different positions that I would need to create the full 360—front, back, three-quarters, sides. I then used the positions (shown, right) as reference when creating the 360 turn with a smart bone.
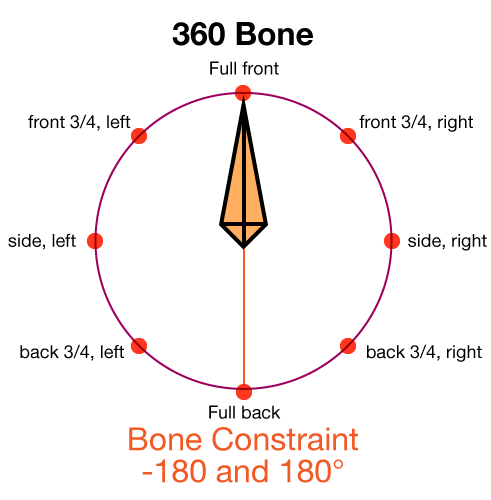
The 360 smart bone for the body is a child of the main character bone. The starting position for the bone is straight up. I held down shift when I first drew the bone to make sure that it wasn’t at a slight angle. I then created a constraint angle to the bone which limits the movement of -180 and 180.
The starting position for the character turn is the front position. I drew each new position at a 45° angle on the smart bone. I repeated the same idea for the head but used a different bone so the head would move independently from the body. The 360 head bone was the actual head bone I used in my skeleton set up. I know that this is probably hard to follow. I’m hoping that once I get both of the characters together, I’ll be able to create a video tutorial on how I did it.
Final verdict
Anime Studio really lives up to my expectations. Smart bones really make the program worth buying. One thing that I hope they work on is an easier way to make character outlines. There isn’t an easy way to currently create a character with outlines that moves into different positions and easily maintains it’s outlines. Trying to patch and hide outlines can be tedious at times in Anime Studio.
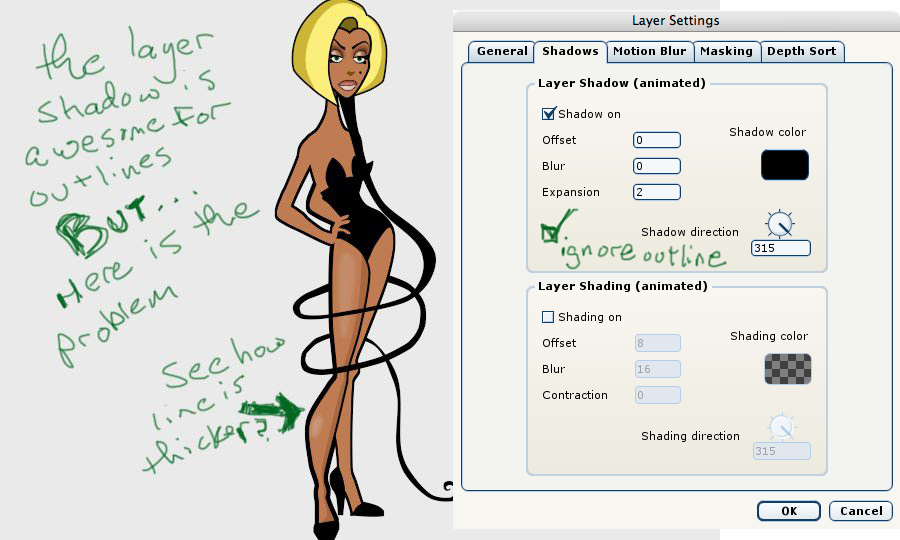
The same was true in the past versions. They do have a nifty layer shadow feature that you can create an outline on an entire layer. The only problem is that if your character already has outlines on certain shapes, it doubles the line. I would love to see them have a “collapse” option in the layer shadow. Instead of the shape outline doubling with the layer shadow, it would ignore the shape’s outline and collapse to the actual shape fill. If they were able do that and give more outline options in the layer shadow, I would be forever happy. It would be neat to make the layer shadow outline resemble a pencil line or some type of drawn effect like you can create in the regular outline mode. Notice that a lot of the more successful Anime Studio examples that are out there don’t use outlines.
Follow the progress
If you want to follow my progress, I have a Tumblr page that’s dedicated to my project and working in Anime Studio. Definitely check it out and let me know if you have any questions.


Great article, love your animatic!
Thx!!!! Glad you enjoyed!
i really need a 360 body turn tutorial coz i really love ASP
I actually have to get back to that project. I’ll definitely do a post on the tips I’ve learned so far:)