Synfig and Advanced Outlines
New and Improved
This is a product innovation that can be described as “new and improved.” For anyone who has ever longed for easily creating variable-line widths when illustrating, look no further. Synfig has been able to adjust line width for as long as I’ve been tinkering with it, but it’s really upped the ante and improved on perfection. If you’ve recently tried the new width tool in Illustrator CS5, you should really try Synfig as a comparison. It’s refreshing to see how much more sophisticated open-source software is becoming, giving industry-standard software a run for its money.
It’s as Easy as Clicking a Button
It’s actually pretty easy. When I first learned that there was such a thing as advanced outlines, I was afraid to use them. Who knows. Would my file break if I tried to use them? What’s so advanced about these newfangled outlines? I thought it would be safe to do some research and ask some questions before implementing them in my project.
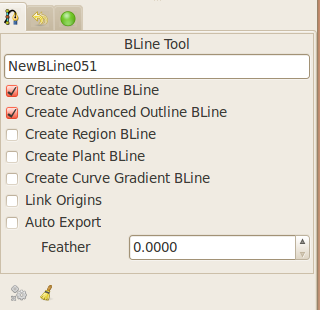
As it turns out, you won’t break your work if use the advanced outlines. How you create an advanced outline is quite simple. When you draw using the bline, shape, or draw tools, you can select ‘create advanced ouline bline’ in the options panel. So it you want to stay old school, just leave the ‘create outline bline’ selected.
Giving the Advanced Outline a Test Drive
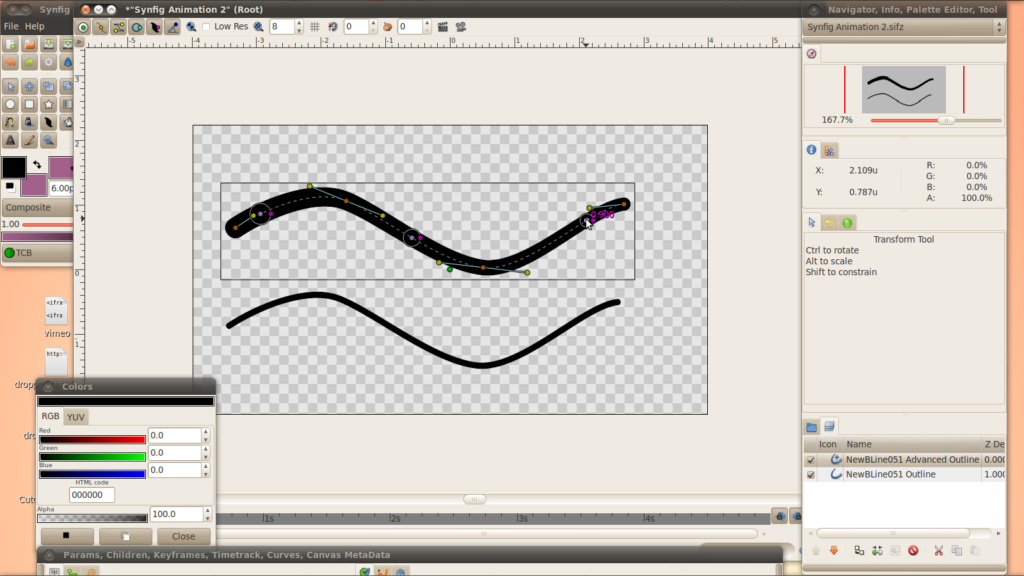
In the screenshots, I created both normal and advanced outlines when I created a line so you could see the difference between the two. In order to offset them, I selected the advanced outline’s layer from the layers panel and then moved the advanced line to another location on the stage with the smooth move tool.
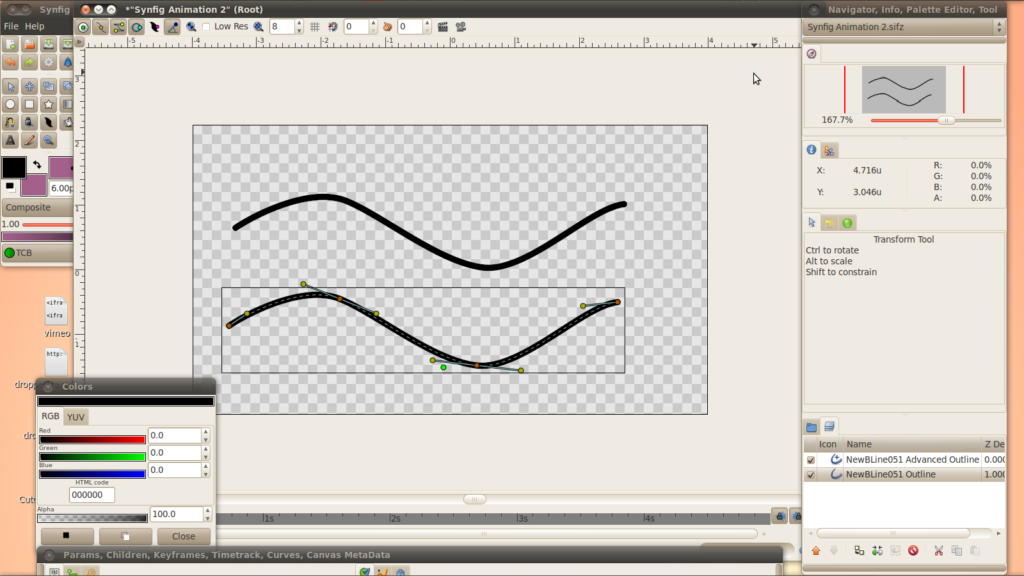
When you create an advanced outline, turn on the toggle width ducks on the top left of your stage window. This will make the width ducks view-able. I like to do this and adjust the width ducks by dragging the circles with the transform tool rather than using the width tool in the tools panel. I think it gives you more control.

So with the transform tool selected, you move the width ducks by pressing the center dot on the width-duck circle. To adjust the width, click and drag the dot located on the circle portion of the width duck. Advanced outlines’ width ducks are independent from the vertices (anchor points) and you can add as many as you like to your bline (path). By default, an advanced outline only comes with two width ducks. In order to create more, right click on one of the width duck center dots and select ‘insert item (smart)’ from the drop down menu. Arrange and size them to your heart’s content.
New and Old Comparison
From the comaprison picture below, you can see the difference between the advanced and original outlines. The original outlines have width ducks, but they’re fused to a vertex (point) while the advanced can move around independently. Take that Adobe!


